
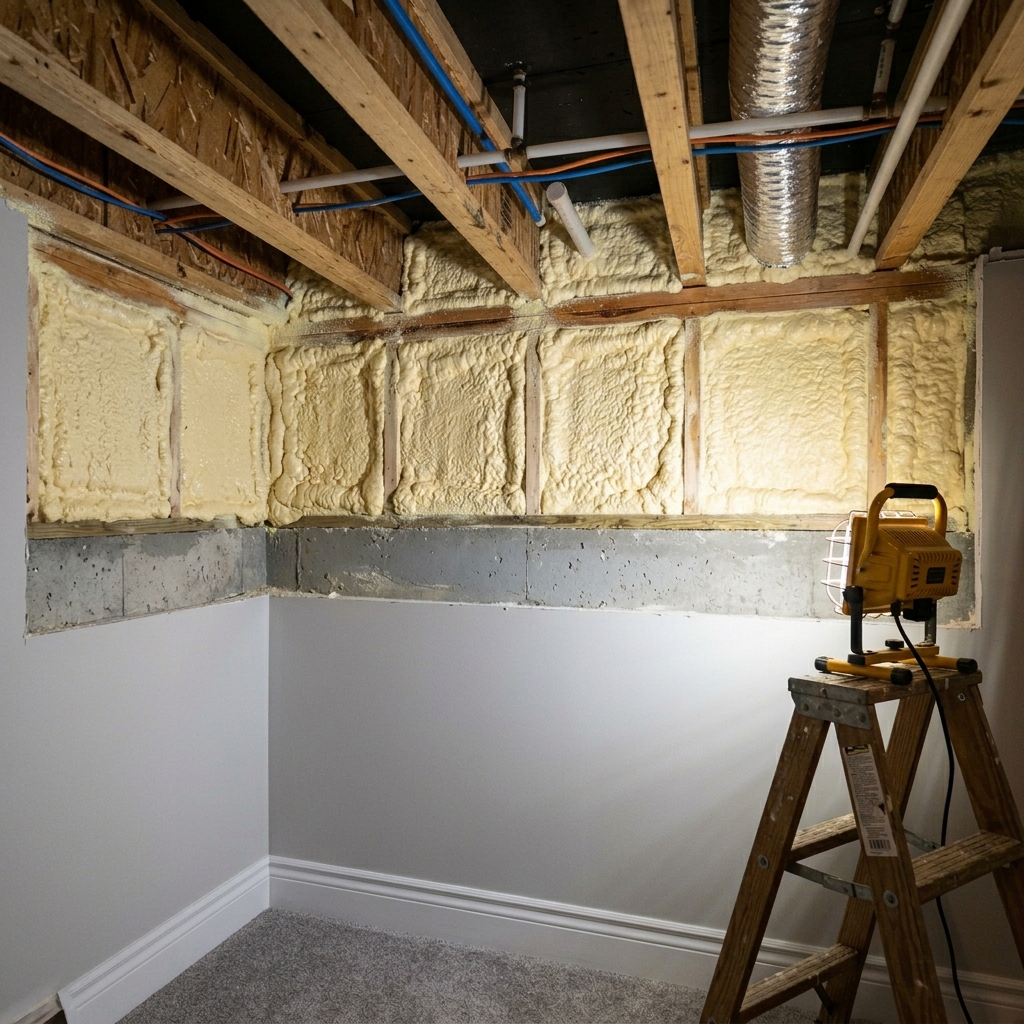
Yes — mold in spray foam can be fixed, but it requires a 4–6 week, 7-phase remediation process that costs $1,700–$7,200 depending on location and severity. If you found mold in your spray foam today, spores germinated 24–48 hours ago; visible colonies mean the problem is at least 3–7 days old. Call 647-641-6881 immediately — mold in an insulated cavity spreads exponentially once established. Spray Foam Kings provides same-week emergency assessments across the GTA at no charge.
This guide covers the complete mold remediation pathway for spray foam insulation in Toronto, Scarborough, North York, Etobicoke, Vaughan, Mississauga, Markham, and Brampton — including GTA cost breakdowns by application, a step-by-step recovery timeline, health risk profiles by homeowner type, closed-cell moisture trapping explained, warranty implications, and how a free pre-spray assessment prevents this entirely.
Mold in Spray Foam: Can It Be Fixed?
Mold in spray foam is fixable, but you cannot simply spray biocide on the foam surface and call it done — the contaminated foam must be physically removed, the substrate treated, the root cause corrected, and fresh foam reapplied. Closed-cell foam is impermeable; once mold establishes in a trapped moisture pocket behind the foam, the foam itself locks in humidity and prevents natural drying. Surface-only treatments fail because the mold colony is growing on the wood or concrete substrate beneath the foam layer, not on the foam itself.
The good news: when caught within 3–7 days (early visible stage) before structural wood colonization, remediation is straightforward and costs $1,700–$3,800 for a typical rim joist application. Waited 2–4 weeks? Structural colonization means wood repair and the cost climbs to $4,000–$7,200 for a basement wall application. The urgency is real: call this week.
See our spray foam cost calculator for project-specific pricing and our basement moisture control guide for the broader moisture management strategy.
Why Mold Grows in Spray Foam: Moisture, Vapor Barriers & Closed-Cell Condensation Traps
Mold grows in spray foam when moisture becomes trapped between the foam and the substrate — a condition closed-cell foam’s impermeability actively creates once moisture is present. Understanding the three moisture pathways that lead to mold is essential for choosing the right remedy and preventing recurrence.
Moisture Pathway Table: Three Mold Trigger Scenarios
| Scenario | Mechanism | Mold Timeline | Liability | Remedy |
|---|---|---|---|---|
| 1. Pre-existing substrate moisture | Wood framing had moisture content >20% at spray time; closed-cell foam sealed vapour in permanently | 3–7 days post-spray | Contractor (failed pre-spray assessment) | Full removal + substrate dry-out + remediation + refoam |
| 2. Active water intrusion post-install | Crack, failed flashing, or plumbing leak allows liquid water behind impermeable foam; water pools in sealed cavity | 3–14 days post-intrusion | Homeowner (leak pre-existed or developed) | Fix leak first → partial foam removal → remediation → refoam |
| 3. Seasonal condensation trapping | Winter: cold GTA rim joist (below dew point) + warm interior air vapour diffuses to cold surface → condenses behind foam → sealed pocket builds to 95–100% RH | 2–6 weeks (seasonal accumulation) | Shared (inadequate vapour management + foam application) | Improve ventilation/drainage + remove foam + remediate + refoam with vapour barrier |
The physics explained: Closed-cell foam is intentionally impermeable — that impermeability is why it achieves R-6 to R-7/inch and blocks air and moisture infiltration. The same impermeability becomes a liability when moisture is present before or behind the foam is applied. Think of closed-cell foam like a plastic bag wrapped around your wall — it keeps cold air out perfectly, but traps any moisture that was already inside. Open-cell foam breathes (allows vapour diffusion), which is why its mold risk is significantly lower despite providing lower R-value per inch.
Mold Growth Timeline: From Spore Germination to Structural Colonization
Mold colonization in spray foam follows a predictable 4-stage timeline — and the difference between an early-stage fix and a major structural remediation is measured in days, not weeks.
| Time Since Moisture Trapped | Mold Stage | What You See/Smell | Health Impact | Action Required | Est. Remediation Cost |
|---|---|---|---|---|---|
| 0–24 hrs | Moisture present; no mold growth | Nothing visible; possible faint dampness odor | None | Moisture meter test; identify and fix moisture source | $200–$500 (testing only) |
| 24–48 hrs | Spore germination — invisible stage | No visible growth; earthy/musty odor may begin | Minimal (spore load still low) | Professional inspection + mold swab test | $500–$1,000 (test + minor remediation) |
| 3–7 days | Visible colonies — early stage | White, green, or black patches on foam edge/substrate; distinct musty smell | Respiratory irritation begins for sensitive individuals | Emergency assessment this week; mold test + remediation | $1,700–$3,800 (rim joist scenario) |
| 2–4 weeks | Structural wood colonization | Heavy colonies; strong odor penetrates adjacent rooms; possible drywall discoloration | Significant respiratory and allergy symptoms; health risk to vulnerable household members | Immediate full remediation; HVAC containment required | $4,000–$7,200 (basement walls) |
| 4–8 weeks | Spread to drywall and framing | Visible staining through drywall; persistent odor; symptoms in healthy adults | High — chronic exposure; anaphylaxis risk for immunocompromised | Major remediation; structural repairs; full foam removal + reapplication | $6,000–$12,000+ (major scenario) |
Signs Your Spray Foam Has Mold (Visual, Odor, Health Symptoms Checklist)
The earliest signs of mold in spray foam are olfactory, not visual — a persistent earthy, musty smell in the basement or crawl space before any discoloration appears. Here are the four mold types most commonly found in GTA spray foam installations, with identification details:
| Mold Type | Appearance | Odor | Health Risk | Common Location |
|---|---|---|---|---|
| Black Mold (Stachybotrys) | Soot-like, dark green-black, slimy texture when wet | Strong musty, earthy | Highest — mycotoxins cause severe respiratory risk | Rim joist wood with chronic moisture (1960s–1980s Toronto homes) |
| Green Mold (Aspergillus/Cladosporium) | Fuzzy green or blue-green patches, powdery surface | Mild musty | Moderate — common allergen; asthma trigger | Basement walls, attic rafters post-condensation |
| White Mold (early-stage) | Chalky white powder or fuzzy white coating on wood | Low or none initially | Low–moderate; often early stage of higher-risk species | Freshly colonized substrate behind foam, crawl spaces |
| Orange/Pink Growth (bacterial) | Pink or orange slimy film on surfaces | Slight sewage or sour odor | Low (non-toxic) but indicates chronic active moisture | Crawl spaces, floor joists with persistent dampness |
Symptom checklist — act immediately if household members experience:
- Persistent cough or sneezing that worsens in the basement or lower levels
- Watery, itchy eyes that improve when you leave the home
- Worsening asthma or allergy symptoms indoors but not outside
- Unexplained headaches or fatigue coinciding with time spent at home
- Musty smell that persists despite thorough cleaning
Health Risks of Mold in Spray Foam (Respiratory, Allergies, Immunocompromised Vulnerability)
Mold in spray foam poses a serious health risk because impermeable foam concentrates mold spores in an enclosed cavity that recirculates through your home’s air system — health effects escalate with exposure duration and depend heavily on your household profile.
| Household Profile | Low Exposure (early stage, 3–7 days) | Moderate Exposure (2–4 weeks) | High Exposure (4+ weeks) |
|---|---|---|---|
| Healthy adult | No symptoms or mild nasal congestion | Persistent cough, eye irritation, fatigue | Respiratory infection risk, bronchitis |
| Child (3–12 yrs) | Mild sneezing, runny nose | Wheezing, sleep disruption, recurring colds | Asthma onset risk, chronic cough, developmental impact |
| Asthmatic/Allergic adult | Asthma flare, worsened allergy symptoms | Shortness of breath, severe allergic reaction risk | Emergency risk — hospitalization possible |
| Immunocompromised (elderly, post-transplant, HIV) | Respiratory irritation; elevated infection risk | Serious infection risk (invasive aspergillosis) | Life-threatening — immediate evacuation recommended |
Important note: SFK provides remediation services, not medical diagnosis. If you or a household member is experiencing respiratory distress you believe is mold-related, consult a physician immediately. For re-occupancy guidance during spray foam work, see our re-occupancy timeline guide.
An additional hazard specific to spray foam: uncured or degrading spray foam off-gasses isocyanates — a potent respiratory sensitizer. Combined with mold spore load, the airborne irritant burden in an enclosed basement is substantially higher than mold alone. Professional containment (HVAC shutoff, negative air pressure, full PPE) is non-negotiable during foam removal.
Closed-Cell vs Open-Cell: Why One Traps Moisture (And the Trade-Offs)
Closed-cell foam is the correct insulation choice for GTA basements and rim joists — but only when a pre-spray moisture assessment confirms wood framing is dry first. Here is the direct mold-risk comparison between foam types:
| Property | Closed-Cell Foam | Open-Cell Foam |
|---|---|---|
| Vapour permeability | Impermeable (Class II vapour retarder) | Breathable (vapour permeable) |
| R-value per inch | R-6 to R-7 | R-3.7 |
| Moisture resistance | High (blocks liquid water + vapour) | Moderate (absorbs moisture when fully saturated) |
| Mold risk if pre-moisture present | HIGH — traps moisture permanently in sealed cavity | Low — vapour diffuses through foam, substrate can dry |
| GTA installed cost | $4.00–$6.00/sqft | $1.50–$3.50/sqft |
| Mold remediation timeline if infected | Full removal + refoam: 3–4 weeks | Targeted replacement: 2–3 weeks |
For Ontario Building Code SB-12 compliance, closed-cell foam at 2 inches (R-12+) on rim joists and below-grade basement walls satisfies the effective thermal resistance requirement. See our thermal barrier compliance guide and our article on when spray foam needs to be covered under Ontario code for compliance details relevant to your application zone.
The recommendation for GTA homes: always use closed-cell on rim joists and below-grade walls — but only after a moisture meter baseline confirms wood framing moisture content is below 20%. Above 20%: remediate the moisture source first, then foam.
Remediation Pathway: Step-by-Step Assessment → Testing → Recovery (GTA Timeline)
Mold remediation in spray foam follows a mandatory 7-phase sequence — skipping steps leads to mold recurrence and voids any remediation warranty. Total timeline is 4–6 weeks if mold is confirmed, or 1–2 weeks if post-assessment testing comes back clean.
| Phase | Activity | Duration | Cost (GTA) | SFK Role |
|---|---|---|---|---|
| Phase 1 | Emergency Assessment — moisture meter readings on all wood framing, visual inspection, odor profiling | 1–2 days | Free (included in SFK quote) | SFK leads |
| Phase 2 | Professional Mold Testing — air sampling + surface swab test, accredited 3–5 day lab turnaround, species identification + spore count | 3–5 days (lab) | $200–$500 | SFK coordinates |
| Phase 3 | Mold Remediation (if test positive) — HVAC containment/shutoff, negative air pressure, HEPA vacuuming, biocide treatment (e.g. Concrobium), structural wood repair where needed | 2–4 weeks | $500–$2,000 | SFK certified remediation partner |
| Phase 4 | Root Cause Fix — seal exterior crack, improve foundation drainage, add exhaust ventilation, repair failed flashing | 3–7 days | $500–$3,000 (varies by root cause) | SFK diagnoses; homeowner or GC executes |
| Phase 5 | Foam Removal — mechanical removal of contaminated closed-cell foam, HEPA disposal, substrate prep | 1–2 days | $1.00–$2.00/sqft | SFK leads |
| Phase 6 | Refoam Application — closed-cell (if moisture fully resolved) or open-cell (breathable option for lower mold risk) | 1 day | $4.00–$6.00/sqft (CC) or $1.50–$3.50/sqft (OC) | SFK leads |
| Phase 7 | Cure + Humidity Validation — 24–48 hr ventilation, post-remediation moisture meter re-check to confirm baseline, humidity sensor placement for ongoing monitoring | 1–2 days | Included in refoam quote | SFK leads |
Scarborough Case Study (2026): A homeowner on Danforth Ave. East discovered black mold on basement rim joist framing 8 months after spray foam installation. Post-discovery moisture meter reading: 35% (safe zone: below 20%). The original contractor had not performed a pre-spray assessment. SFK’s remediation timeline: emergency assessment (2 days) → mold test positive, Stachybotrys confirmed (5-day lab result) → mold remediation with biocide treatment and HEPA containment (3 weeks) → foam removal (2 days) → interior drainage tile repair by plumber, $2,000 separate → closed-cell refoam at 3 inches (3 days) → cure and post-remediation re-check (2 days) = 5.5 weeks total. Total remediation cost: $4,000 (mold remediation $800 + foam removal $300 + refoam $900 + drainage repair $2,000). Post-remediation moisture stable at 18%. Zero mold recurrence at 6-month follow-up. As the homeowner put it: “The pre-spray moisture assessment SFK does for free? That’s the $4,000 insurance the first contractor skipped.”
Cost Breakdown: Testing + Mold Remediation + Foam Removal + Reapplication (By Application)
GTA mold remediation costs for spray foam range from $1,700 to over $11,000 depending on application zone, severity, and whether mold testing returns positive — here is the full cost breakdown by application type.
| Application | Testing | Mold Remediation | Foam Removal | Refoam (CC) | Vapour Barrier/Drainage | Total (Mold Found) | Total (Clean Test) |
|---|---|---|---|---|---|---|---|
| Rim Joist (100 lin ft) | $200–$500 | $500–$1,500 | $100–$200 | $400–$600 | $500–$1,000 | $1,700–$3,800 | $1,200–$1,800 |
| Basement Walls (400 sqft) | $200–$500 | $1,000–$2,000 | $400–$800 | $1,600–$2,400 | $800–$1,500 | $4,000–$7,200 | $3,000–$4,900 |
| Attic (1,200 sqft) | $100–$300 | $300–$800 | $1,200–$2,400 | $4,800–$7,200 | $500–$1,000 (ventilation upgrade) | $6,900–$11,700 | $6,600–$10,900 |
GTA regional pricing notes: Labour rates in downtown Toronto and North York run 10–15% higher than Mississauga and Brampton. Travel to Vaughan and Markham adds $75–$150 per visit for multi-day projects. Rim joist projects in older Toronto homes (1960s–1980s construction) typically add $200–$400 for precautionary dust management where pipe insulation may be present nearby.
Ontario energy rebates — Greener Homes Grant (up to $10,600) and IESO programs — generally do not cover mold remediation costs, but may cover the refoam component when part of a qualifying energy retrofit. See our Ontario insulation rebate library for current program details and stacking strategies. For a full material cost comparison across all insulation types, use our interactive cost calculator.
How to Detect Mold Before Visible Growth (Moisture Meter Guide + Pre-Spray Assessment Value)
The most effective mold prevention tool is a moisture meter baseline reading taken before foam is applied — a reading above 20% MC in wood framing is a mandatory stop-work indicator. Here is SFK’s 5-step GTA pre-spray assessment protocol, applied on every project at no charge:
- Moisture Meter Baseline: All wood framing (rim joist, wall plates, studs) must read below 20% MC. Readings of 20–25%: flag and monitor for 2 weeks before foaming. Readings above 25%: mandatory moisture source investigation and remediation before any foam application.
- Visual Mold Inspection: Check for discoloration on wood (grey, black, green staining), efflorescence on concrete (white mineral deposits indicate active water migration), visible mold colonies, and soft or punky wood texture indicating early rot.
- Mold Swab Test (if suspected): $200–$500 for professional air sampling and surface swab with 3–5 day accredited lab result. Do NOT skip this if visual inspection shows any staining or odor — lab confirmation protects both contractor and homeowner legally.
- Humidity Sensor Placement: Install a Bluetooth RH sensor in the cavity post-spray. GTA target: below 60% RH in unheated basements year-round, below 50% in finished spaces. A spike above 70% RH within 2–4 weeks post-foam warrants immediate investigation.
- 2–4 Week Post-Foam Re-inspection: Return moisture meter reading (should match baseline ±2%), visual odor check, documentation shared with homeowner for records.
The baseline reading is also legal protection in both directions: if mold appears after installation, the baseline proves whether it was pre-existing (homeowner responsibility for the root cause) or developed after proper application (contractor responsibility under warranty). Every SFK quote includes this at zero charge.
Warranty & Liability: What SFK Covers (And What Doesn’t)
SFK’s spray foam warranty covers craftsmanship and product performance for 10 years — but does NOT cover mold caused by pre-existing water intrusion that was present or undisclosed at the time of installation.
SFK Warranty — Covered (10 Years)
- Spray foam thermal performance (R-value and air sealing effectiveness)
- Thermal barrier integrity (fire rating, OBC SB-12 compliance) — see our rim joist insulation and OBC compliance guide
- Craftsmanship defects: incomplete spray coverage, poor seal at substrate transitions, improper application thickness
- Mold arising from a proven construction defect in the foam application (e.g., foam seal failure that created a new moisture pathway post-install)
SFK Warranty — Not Covered
- Mold from pre-existing water intrusion (active leak or wet framing present at spray time; homeowner must disclose and fix first)
- Moisture trapping from homeowner-caused vapour intrusion post-install (e.g., unvented bathroom exhaust into attic, dehumidifier not running in chronically humid basement)
- Condensation from seasonal temperature swings — normal in Ontario; managed via dehumidifier and ventilation, not foam replacement
- Mold where baseline moisture readings exceeded 20% MC and homeowner declined the pre-remediation recommendation before foaming
The warranty divider: SFK fixes the foam envelope. You fix the leak. Together, we prevent mold. When SFK performs the pre-spray assessment and documents the baseline, both parties have clear, documented accountability. This is why we insist on the assessment — not as an upsell, but as the only fair way to allocate responsibility before any foam touches your walls.
Prevention: Vapor Barriers, Ventilation & Seasonal Humidity Management
The most cost-effective mold prevention combines the right vapour barrier for each application zone, adequate mechanical ventilation, and seasonal humidity management — all implemented before foam is applied.
Vapour Barrier Strategy by Application Zone
| Application Zone | Recommended Strategy | Material Cost |
|---|---|---|
| Rim joist (below-grade) | 6-mil poly sheeting vapour barrier + closed-cell foam (min 2 inches) | Poly: $0.20–$0.50/sqft; foam adds $4–$6/sqft |
| Basement walls (below-grade) | Damp-proof membrane on exterior (if accessible) + closed-cell foam interior | Membrane: $0.50–$1.50/sqft; foam: $4–$6/sqft |
| Attic (ventilated) | Open-cell foam + existing ventilation preserved (soffits clear, ridge vent open) | OC foam: $1.50–$3.50/sqft |
| Crawl space | Full poly encapsulation (floor + walls) + closed-cell foam on walls | Encapsulation: $3–$7/sqft; foam: $4–$6/sqft |
Seasonal Humidity Management for Ontario Homes
- Spring (March–May): Run basement dehumidifier; target 50% RH. Outdoor air warming while basement remains cold is condensation season. Check downspouts — soil should slope away from foundation 1 inch per foot for 6 feet minimum.
- Summer: Keep crawl space vents open; basement dehumidifier at 50% RH. High outdoor humidity plus cool basement creates a persistent moisture gradient.
- Fall (September–November): Second condensation peak as heating season starts. Ensure bathroom and kitchen exhaust fans vent entirely outside, not into attic. Check attic ventilation: soffits must be unobstructed, ridge vent clear.
- Winter: Reduce indoor humidity to 35–40% RH to prevent condensation on cold exterior walls. Never vent a dryer or range hood into an attic or basement cavity.
Four-Question Decision Tree: What Should You Do Right Now?
- Is there visible mold in your spray foam? YES → Emergency assessment this week. Call 647-641-6881. Do not delay.
- Musty odor without visible growth? YES → Moisture meter test and professional inspection within 2–3 days. You are in the 24–48 hour spore germination window — catch it now.
- When was foam installed? Under 3 months ago → Likely post-install issue (document everything; this may be contractor liability). Over 12 months → More likely pre-existing moisture or seasonal condensation; homeowner responsible for root cause, contractor responsible for foam performance warranty.
- Did the original contractor do a pre-spray moisture assessment? NO → Get a baseline now regardless (prevents disputes, guides prevention strategy). YES → Pull the baseline report and compare to current moisture readings to pinpoint where and when the moisture problem began.
Spray Foam vs Fiberglass vs Cellulose: Mold Resistance Comparison
| Property | Closed-Cell Spray Foam | Open-Cell Spray Foam | Fiberglass Batt | Cellulose (Blown-In) |
|---|---|---|---|---|
| R-value per inch | R-6 to R-7 | R-3.7 | R-3.2 to R-3.8 | R-3.2 to R-3.8 |
| Air sealing | Excellent | Good | Poor (gaps at framing) | Moderate |
| Foam/material mold resistance | Inert (foam is not a food source) | Inert | Faces can harbour mold spores | Organic material — feeds mold when wet |
| Mold risk from moisture trapping | High (impermeable seal traps moisture) | Low (breathable) | Moderate–High (holds moisture in fibres) | High when saturated |
| Moisture management | Blocks vapour (Class II vapour retarder) | Allows vapour diffusion | No vapour management | Hygroscopic — absorbs moisture |
| GTA installed cost | $4.00–$6.00/sqft | $1.50–$3.50/sqft | $0.80–$1.50/sqft | $0.60–$1.20/sqft |
| Rebate eligible (CGHR/HER+/OAIR) | Yes (SPFA-certified contractor required) | Yes (SPFA-certified) | Yes (with energy audit) | Yes (with energy audit) |
| Best application (mold-risk zones) | Rim joist, below-grade walls (with pre-assessment) | Attic (breathable), above-grade walls | Interior walls, above-grade only | Attic top-up only; not below-grade |
FAQ: 15 Questions on Mold in Spray Foam — Detection, Remediation, Health & Prevention
Can mold grow in spray foam insulation?
Mold does not grow on spray foam itself (the foam is inert and not a food source), but grows readily on wood and concrete substrates behind the foam when moisture is trapped in the cavity. Closed-cell foam’s impermeability creates ideal mold germination conditions — 95–100% relative humidity — within 24–48 hours of moisture being sealed in a cavity.
How long does it take for mold to develop in spray foam?
Spore germination begins within 24–48 hours of moisture being trapped; visible colonies appear in 3–7 days; structural wood colonization occurs in 2–4 weeks. If you can see mold today, the moisture event that caused it occurred at least 3–7 days ago. Act immediately before reaching the structural damage phase.
What does mold in spray foam look like?
Mold in spray foam typically appears on exposed wood at the edge of or beneath the foam layer — not on the foam surface itself. Look for white chalky patches (early stage), fuzzy green or blue-green colonies (Aspergillus/Cladosporium), or soot-like black staining (Stachybotrys) on rim joist framing. A persistent musty or earthy odor is often detectable before any visual signs appear.
Is mold in spray foam a health hazard?
Yes — mold in spray foam is a significant health hazard because impermeable foam concentrates spore-laden air in enclosed cavities that recirculate through the home. Children, asthmatics, and immunocompromised individuals face the highest risk, including potential life-threatening invasive aspergillosis from chronic high-spore exposure. Healthy adults typically experience respiratory irritation and fatigue initially, escalating with exposure duration.
Why is closed-cell foam more prone to mold risk than open-cell?
Closed-cell foam is impermeable to water vapour — a design feature for thermal performance that permanently traps moisture when condensation forms on the substrate before or after installation. Open-cell foam is vapour-permeable, allowing moisture to diffuse outward and substrates to dry naturally, preventing the high-humidity sealed pockets that trigger mold germination in 24–48 hours.
Can you fix mold in spray foam without removing all the foam?
In most cases no — mold grows on the substrate behind the impermeable foam, so surface biocide treatments consistently fail to resolve the colonisation. Full foam removal is required for contamination that has reached wood framing. Partial removal may be possible for very small isolated sections under 10 sqft with confirmed shallow growth, but cutting corners here causes mold recurrence within 6–12 months.
How much does mold remediation in spray foam cost in Toronto?
Mold remediation in spray foam costs $1,700–$3,800 for a rim joist application (100 lin ft), $4,000–$7,200 for basement walls (400 sqft), and $6,900–$11,700 for an attic (1,200 sqft) in GTA — covering mold testing ($200–$500), professional remediation ($500–$2,000), foam removal ($1–$2/sqft), closed-cell refoam ($4–$6/sqft), and vapour barrier or drainage corrections ($500–$1,500).
What is the timeline for mold removal, foam removal, and reapplication?
The complete 7-phase process takes 4–6 weeks when mold is confirmed: emergency assessment (1–2 days) + mold lab testing (3–5 days) + mold remediation (2–4 weeks) + root cause correction (3–7 days) + foam removal (1–2 days) + refoam application (1 day) + cure and humidity validation (1–2 days). If testing returns a clean result, the process completes in 1–2 weeks.
Does spray foam warranty cover mold damage?
SFK’s 10-year warranty covers mold caused by a craftsmanship defect in the foam application (e.g., a foam seal failure that created a new moisture pathway). It does NOT cover mold from pre-existing water intrusion present at installation time, homeowner-caused vapour intrusion post-install, or normal seasonal condensation. The pre-spray baseline assessment documents the liability boundary for both parties.
How do I detect mold in spray foam before it becomes visible?
The earliest detectable sign is a musty or earthy odor present within 24–48 hours of germination. Professional detection uses digital moisture meters (wood framing above 20% MC indicates trapped moisture), air quality sampling, and mold swab tests ($200–$500). SFK’s free pre-spray assessment documents a baseline moisture reading on every project to catch emerging issues before foam is ever applied.
What causes moisture to be trapped in closed-cell foam?
Three causes drive moisture trapping in closed-cell foam: (1) pre-existing moisture in wood framing at spray time, sealed in permanently by the impermeable foam; (2) active water intrusion post-install through cracks, failed flashing, or plumbing leaks; (3) seasonal condensation in GTA homes where warm interior air contacts cold rim joists in winter and condensed moisture cannot escape through the impermeable foam layer.
Can I prevent mold in spray foam with a vapour barrier?
Yes — for below-grade applications, a 6-mil poly vapour barrier (or exterior damp-proof membrane) combined with properly applied closed-cell foam is the gold-standard GTA prevention strategy. The barrier intercepts moisture before it reaches the substrate; the closed-cell foam provides the thermal envelope. For attics, open-cell foam with unobstructed soffit-to-ridge ventilation eliminates the condensation trapping mechanism entirely.
Should I get a pre-spray moisture assessment before foam installation?
Absolutely yes — a pre-spray moisture assessment is the single most important step in preventing mold after spray foam installation. It costs nothing (included in every SFK quote), takes approximately 20 minutes, documents baseline moisture content in all wood framing, identifies any pre-existing mold or moisture issues, and creates a legal record protecting both homeowner and contractor from post-install disputes worth thousands of dollars.
What is the difference between mold testing and visual inspection?
Visual inspection identifies visible colonies and assesses moisture conditions but cannot detect spore-level contamination before colonies form, identify mold species (critical for health risk assessment and insurance claims), or provide the lab-certified documentation needed for warranty disputes. Professional mold testing ($200–$500) uses accredited-lab air sampling and surface swabs returning species identification and spore count within 3–5 days — necessary any time moisture readings exceed 20% MC or musty odor is present without visible growth.
Can I stay in my house during mold remediation in spray foam?
For small, contained rim joist projects with low spore counts, occupancy is often possible with the basement sealed off and HVAC shut down in that zone. For whole-basement remediation, confirmed Stachybotrys colonization, or whole-home HVAC contamination, temporary relocation is strongly recommended — particularly for children, asthmatics, and immunocompromised household members. SFK provides project-specific occupancy guidance. See our re-occupancy timeline guide for details.
Why Spray Foam Kings: Pre-Spray Moisture Assessment + Certified Mold-Ready Process
Spray Foam Kings is the GTA’s leading SPFA-certified spray foam contractor combining a mandatory free pre-spray moisture protocol, in-house mold remediation coordination, and 15+ years of experience with Toronto’s most mold-prone housing stock — making us the right call whether you are planning a new installation or managing an active mold crisis today.
- Free pre-spray moisture assessment on every project: Moisture meter baseline on all wood framing, visual mold inspection, mold swab coordination when readings exceed 20% MC. Not an upsell — standard on every SFK quote, no exceptions.
- SPFA certified, $5M liability insurance, WSIB covered: Full credentials for Ontario homeowners and property managers. Phase 3 mold remediation is coordinated with accredited remediation partners while SFK leads foam removal and reapplication.
- 15+ years GTA experience: Deep familiarity with moisture profiles of Toronto’s 1960s–1980s housing stock (high rim joist condensation risk at Danforth, Scarborough, and older North York neighbourhoods), Mississauga and Vaughan new-builds (better OBC compliance, lower baseline mold risk), and Etobicoke and Brampton semi-detached homes (shared wall moisture pathways).
- Ontario rebate expertise: The refoam component of a remediation project may qualify for Canada’s Greener Homes Grant (up to $10,600) and IESO programs when combined with a qualifying energy audit and retrofit. SFK handles rebate documentation and application paperwork — see our full basement spray foam service scope for included deliverables.
- 10-year warranty backed by documented baseline: Our warranty is meaningful because we document the pre-spray state on every project. This is standard SFK practice — not an upgrade tier.
Service area: Toronto, Scarborough, North York, Etobicoke, Vaughan, Mississauga, Markham, Brampton. Same-week emergency assessments available across all GTA zones. Visit our spray foam insulation service page for full project scope and service area coverage details.
Get Your Free Quote Today
Call: 647-641-6881
Same-week emergency assessments across the GTA. Baseline moisture assessment included in every quote at no charge. Don’t wait: mold colony size doubles every 24–48 hours once established in a trapped moisture cavity. The difference between a $1,700 rim joist fix and a $7,200 basement wall remediation is measured in days.